extmail电子邮件系统
本站寻求有缘人接手,详细了解请联系站长QQ1493399855
Extmail电子邮件系统搭建
一、结构图
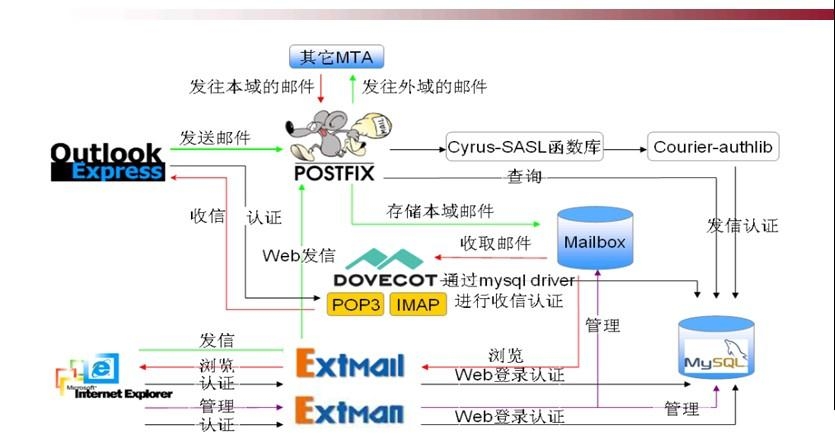
二、搭建过程
1、安装需要的软甲包
[root@ahao1 ~]# yuminstall httpd mysql mysql-server mysql-devel openssl-devel dovecot perl-DBD-MySQL tcl tcl-devel libart_lgpl libart_lgpl-devellibtool-ltdl libtool-ltdl-devel expect telnet
[root@ahao1 ~]# service mysqld start //启动mysql服务
[root@ahao1 ~]# chkconfig mysqld on //加入chkconfig开机自启管理
[root@ahao1 ~]# mysqladmin -u root -p password '123'; //修改数据库管理员的密码
2、安装postfix
因为我们要安装的postfix是源代码安装的,所以系统自带安装的postfix需要我们事先卸载掉,但还是需要保留它的控制脚本。
[root@ahao1 ~]# cd /etc/init.d/
[root@ahao1 init.d]# cp postfix postfix.bak //备份控制脚本
[root@ahao1 init.d]# yum remove postfix //卸载
安装postfix,

这是我们需要安装的软件包其中就有postfix
安装之前需要将原有的postfix所属组和所有者账户删掉
[root@ahao1 extmail]# userdel -r postfix //删除postfix用户和postfix组
[root@ahao1 extmail]# groupdel postfix
[root@ahao1 extmail]# groupadd -g 2525 -r postfix //创建新组
[root@ahao1 extmail]# useradd -g postfix -u 2525 -s/sbin/nologin -M postfix //创建新用户
[root@ahao1 extmail]# groupdel postdrop //删除postdrop组
[root@ahao1 extmail]#groupadd -g 2526 -r postdrop //创建新用户postdrop和postdrop组
[root@ahao1 extmail]# useradd -g postdrop -u 2526 -s/sbin/nologin -M postdrop
[root@ahao1 extmail]# tar -zxvf postfix-2.8.2.tar.gz -C/usr/local/src/ //解压
[root@ahao1 src]# cd postfix-2.8.2/ //进入解压目录、当我需要编译安装时候我们找不到configure文件,所以需要换一种方式:
直接对makefile文件进行修改:
[root@ahao1 postfix-2.8.2]# make makefiles'CCARGS=-DHAS_MYSQL -I/usr/include/mysql -DUSE_SASL_AUTH -DUSE_CYRUS_SASL-I/usr/include/sasl -DUSE_TLS ''AUXLIBS=-L/usr/lib64/mysql -lmysqlclient -lz -lm -L/usr/lib/sasl2 -lsasl2 -lssl -lcrypto'
修改之后我们就进行安装:
[root@ahao1 postfix-2.8.2]# make
[root@ahao1 postfix-2.8.2]# make install //makeinstall之后,还要更改一些文件目录选项,我们只需要更改临时文件存放目录,其他默认就可以。
照以下的提示输入相关的路径([]号中的是缺省值,”]”后的是输入值,省略的表示采用默认值)
install_root: [/] /
tempdir: [/usr/local/src/ postfix-2.6.5] /tmp
config_directory: [/etc/postfix] /etc/postfix
daemon_directory: [/usr/libexec/postfix]
command_directory: [/usr/sbin]
queue_directory: [/var/spool/postfix]
sendmail_path: [/usr/sbin/sendmail]
newaliases_path: [/usr/bin/newaliases]
mailq_path: [/usr/bin/mailq]
mail_owner: [postfix]
setgid_group: [postdrop]
html_directory: [no] /var/www/postfix_html
manpages: [/usr/local/man]
readme_directory:[no]
[root@ahao1 postfix-2.8.2]# newaliases
[root@ahao1 postfix-2.8.2]# cd /etc/init.d/ //找回控制脚本
[root@ahao1 init.d]# mv postfix.bak postfix
安装完成之后我们启动一下试试:
可以发现是可以启动的但是端口25却没有启动、所以我们需要排查问题、首先去查看日志:
[root@ahao1 init.d]# service postfix start
Starting postfix: [ OK ]

可以发现还是有问题的,所以就逐一解决问题、
[root@ahao1 init.d]# ll -d /var/lib/postfix/
drwx------. 2 89 root 4096 Dec 22 18:07 /var/lib/postfix/
[root@ahao1 init.d]# chown -R postfix.postfix/var/lib/postfix/ //将目录的所有者和所属组改成postfix
[root@ahao1 init.d]# chown -R postfix /var/spool/postfix/public/
[root@ahao1 init.d]# chown -R postfix /var/spool/postfix/private/
修改之后再次重启一下:
[root@ahao1init.d]# service postfix restart
Shuttingdown postfix: [ OK ]
Startingpostfix: [ OK ]
[root@ahao1init.d]# netstat -tupln | grep 25
tcp 0 0 0.0.0.0:25 0.0.0.0:* LISTEN 9271/master
现在我们已经看到端口已经启动了、
[root@ahao1 init.d]# chkconfig --add postfix //j加入chkconfig管理
[root@ahao1 init.d]# chkconfig postfix on
[root@ahao1 init.d]# useradd user1 //我们创建一个账户测试是否能发送接收邮件
[root@ahao1 init.d]# hostname mail.a.com //更改主机名
[root@ahao1init.d]# vim /etc/sysconfig/network //修改主机名
NETWORKING=yes
HOSTNAME=mail.a.com
完成之后、修改postfix主配置文件main.cf
[root@mail ~]# vim /etc/postfix/main.cf
76 myhostname = mail.a.com
83 mydomain = a.com
99 myorigin = $mydomain
161 mydestination = $myhostname, localhost.$mydomain,localhost, $mydomain
260 mynetworks = 127.0.0.0/8
//数字为行号
[root@mail ~]# service postfix restart //重启服务
我们发送一封邮件测试一下:
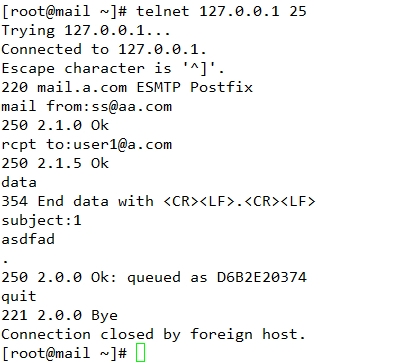


证明邮件发送还是正常的。
2、配置cyrus-sasl
[root@mail lib]# cd /usr/local/lib
[root@mail lib]# mkdir sasl2
[root@mail lib]# cd sasl2/
[root@mail sasl2]# vim smtpd.conf
写入配置文件:
pwcheck_method: saslauthd
mech_list: PLAIN LOGIN
[root@mail sasl2]#vim /etc/postfix/main.cf //编辑配置文件
加入一些配置

[root@mail sasl2]# service postfix restart //重启postfix服务
[root@mail sasl2]# service saslauthd start //重启验证服务
现在我在测发送邮件是否有验证:
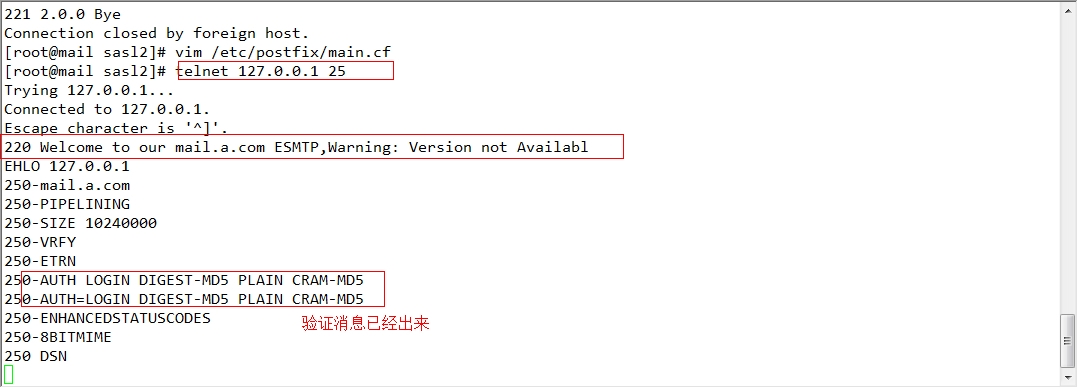
3、安装Courierauthentication library
[root@mail courier-authlib-0.63.0]# tar -jxvfcourier-authlib-0.63.0.tar.bz2 -C /usr/local/src
[root@mail courier-authlib-0.63.0]# cd/usr/local/src/courier-authlib-0.63.0/
[root@mail courier-authlib-0.63.0]# ./configure --prefix=/usr/local/courier-authlib--sysconfdir=/etc --with-authmysql --with-mysql-libs=/usr/lib/mysql--with-mysql-includes=/usr/include/mysql --with-redhat --with-authmysqlrc=/etc/authmysqlrc --with-authdaemonrc=/etc/authdaemonrc
[root@mail courier-authlib-0.63.0]# make && makeinstall
[root@mail courier-authlib-0.63.0]# cd/usr/local/courier-authlib/ //切换到安装目录
[root@mail courier-authlib]# vim /etc/ld.so.conf.d/courier-authlib.conf //将courier-authlib 的库文件输出到系统目录下
/usr/local/courier-authlib/lib/courier-authlib/
[root@mail courier-authlib]# ldconfig //重新加载系统库
[root@mail courier-authlib]# ldconfig -pv | grep courier //查看是否加载成功
[root@mail courier-authlib]# ln –s /usr/local/courier-authlib/include/ /usr/include/courier-authlib //为头文件创建链接
[root@mailcourier-authlib]# cd /usr/local/src/courier-authlib-0.63.0/ //切换到解压目录
[root@mail courier-authlib-0.63.0]# cpcourier-authlib.sysvinit /etc/init.d/courier-authlib //拷贝控制脚本
[root@mail courier-authlib-0.63.0]# chmod a+x/etc/init.d//courier-authlib //为脚本增加权限
[root@mail courier-authlib-0.63.0]# cd /usr/local/courier-authlib/var/spool
[root@mail spool]# chmod 755 authdaemon/ //为authdamon目录增加权限
[root@mail spool]# cp /etc/authmysqlrc.dist /etc/authmysqlrc
[root@mail spool]# cp /etc/authdaemonrc.dist /etc/authdaemonrc
[root@mail spool]# vim /etc/authdaemonrc //修改配置文件,添加如下:
27 authmodulelist=" authmysql "
34 authmodulelistorig="authmysql"
[root@mailspool]# vim /etc/authmysqlrc
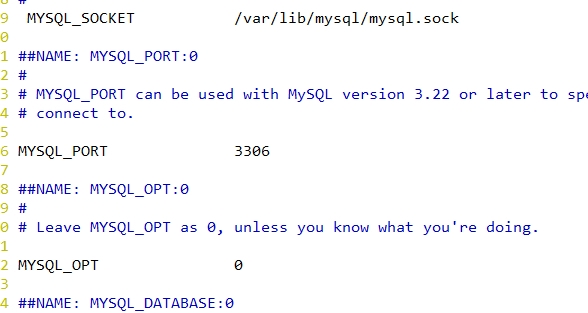
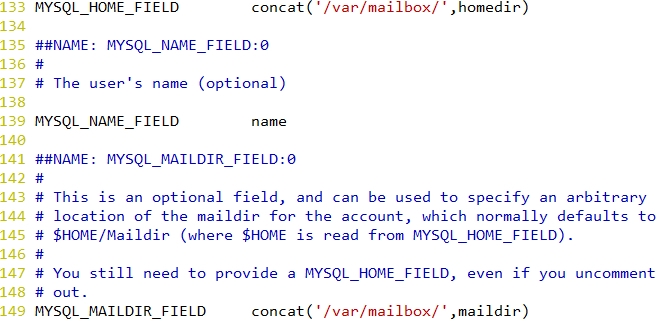
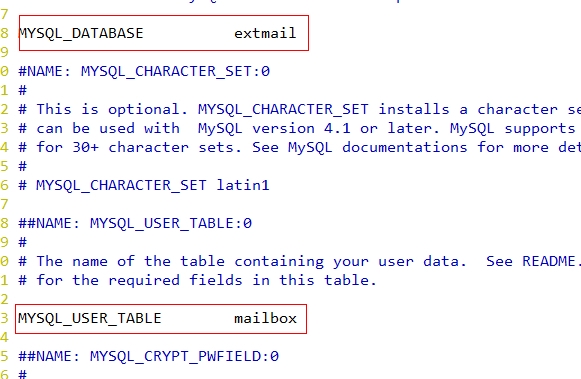
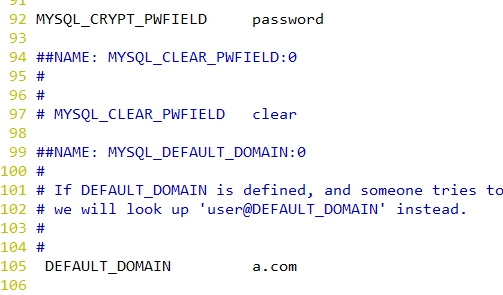

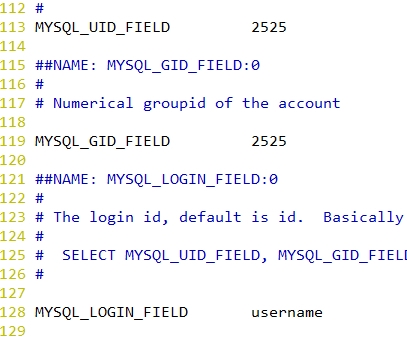
[root@mail spool]# service courier-authlib start //启动courier-authlib
[root@mail authdaemon]# chkconfig --add courier-authlib //加入chkconfig管理
[root@mail authdaemon]# chkconfig courier-authlib on
新建虚拟用户邮箱所在的目录,并将其权限赋予postfix用户:
mkdir -pv /var/mailbox
chown –R postfix/var/mailbox
接下来重新配置SMTP 认证,编辑 /usr/local/lib/sasl2/smtpd.conf ,确保其为以下内容:
·pwcheck_method: authdaemond
log_level: 3
mech_list:PLAIN LOGIN
auhdaemond_path:/usr/local/courier-authlib/var/spool/authdaemon/socket
[root@mail ~]# service saslauthd restart //重启验证服务
[root@mail ~]# service courier-authlib restart
4、让postfix支持虚拟域和虚拟用户
编辑/etc/postfix/main.cf,添加如下内容:
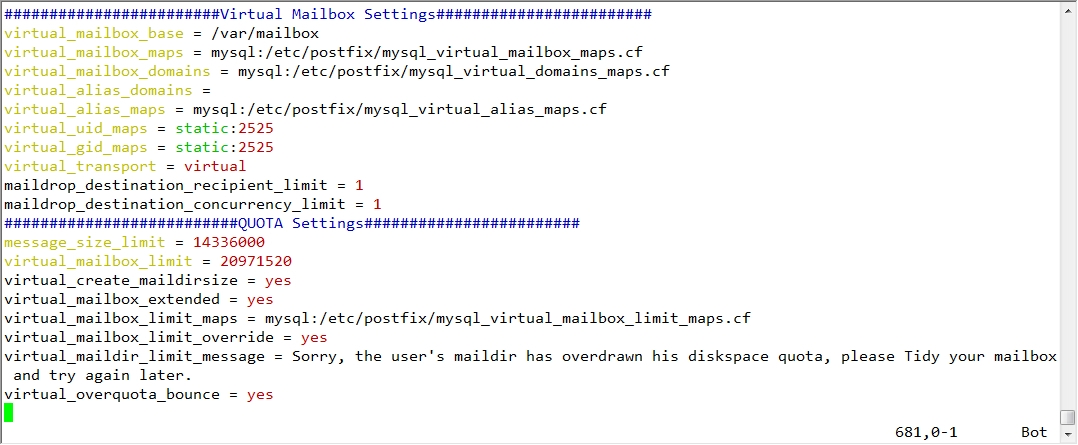
使用extman源码目录下docs目录中的extmail.sql和init.sql建立数据库:
[root@mail ~]# cd extmail/
[root@mail extmail]# tar -zxvf extman-1.1.tar.gz
cd extman-1.1/docs
[root@mail docs]# mysql -u root -p < extmail.sql //导入数据库文件
[root@mail docs]# mysql -u root -p < init.sql
查看数据库看是否生成extmail数据库,及数据库中的表:
[root@mail ~]# mysql -u root –p
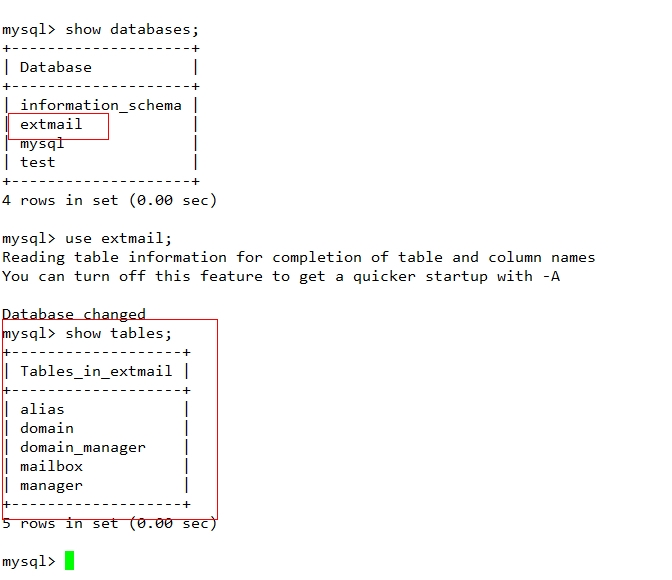
授予用户extmail访问extmail数据库的权限:
截
[root@mail docs]# cp mysql_virtual_* /etc/postfix/
[root@mail docs]# service postfix restart //重启postfix服务
5、配置dovecot
[root@mail docs]# cd /etc/dovecot/
[root@mail dovecot]# cd conf.d/
[root@mail conf.d]# vim 10-mail.conf //修改配置文件
mail_location = maildir:/var/mailbox/%d/%n/Maildir //虚拟账户是以目录的形式存放在当前目录下的
[root@mail conf.d]# vim auth-sql.conf.ext
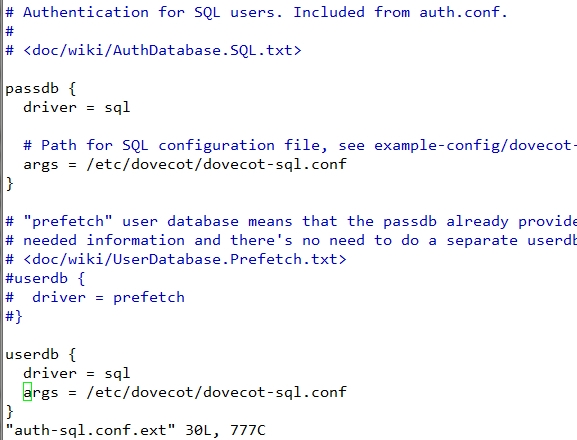

[root@mail conf.d]# service dovecot start //启动dovecot服务
[root@mail conf.d]# chkconfig dovecot on
6、安装extmail
[root@mail conf.d]# cd
[root@mail ~]# cd extmail/
[root@mail extmail]# mkdir /var/www/extsuite //创建extmail页面存放的目录
[root@mail extmail]# tar -zxvf extmail-1.2.tar.gz -C /var/www/extsuite/ //解压到对应目录
[root@mail extmail]# mv extman-1.1 /var/www/extsuite/ //
[root@mail extmail]# cd /var/www/extsuite/
[root@mail extsuite]# mv extmail-1.2 extmail //更名
[root@mail extsuite]# mv extman-1.1/ extman
[root@mail extsuite]# cd extmail/
[root@mail extmail]# cp webmail.cf.default webmail.cf
[root@mail extmail]# vim webmail.cf //编辑extmail的配置文件,修改相关信息
77 SYS_USER_LANG = zh_CN
127 SYS_MAILDIR_BASE = /var/mailbox
139 SYS_MYSQL_USER = extamil
140 SYS_MYSQL_PASS = extmail
197 SYS_AUTHLIB_SOCKET =/usr/local/courier-authlib/var/spool/authdaemon/socket
注意:行首为配置文件内行号
7、配置Apache服务
修改 cgi执行文件属主为postfix运行身份用户:
chown -R postfix.postfix /var/www/extsuite/extmail/cgi/
[root@mail cgi]# vim /etc/httpd/conf/httpd.conf //修改Apache配置文件


[root@mail cgi]# service httpd restart //启动Apache服务
我们测试咋在浏览器中查看extmail是否可以使用(输入http://192.168.1.169/extmail):

出现了这样的问题,根据提示显示的是,关于perl5和CGI的错误,这样的错误可能是Perl-CGI的软件包没有安装,我们安装就可以了:
[root@mail cgi]# yum install perl-CGI perl-CGI-Session
安装之后重启服务:
[root@mail cgi]# service httpd restart
再次测试:

提示我们找不到Syslog,其实Syslog是extmail的一个插件,我们安装就可以了:
[root@mail cgi]# cd
[root@mail extmail]# tar -zxvf Unix-Syslog-0.100.tar.gz -C/usr/local/src //解压
[root@mail extmail]# cd /usr/local/src/Unix-Syslog-0.100/
[root@mail Unix-Syslog-0.100]# perl Makefile.PL //使用Perl工具编译
[root@mail Unix-Syslog-0.100]# make //安装
[root@mail Unix-Syslog-0.100]# make install
安装之后重启服务,重新测试:
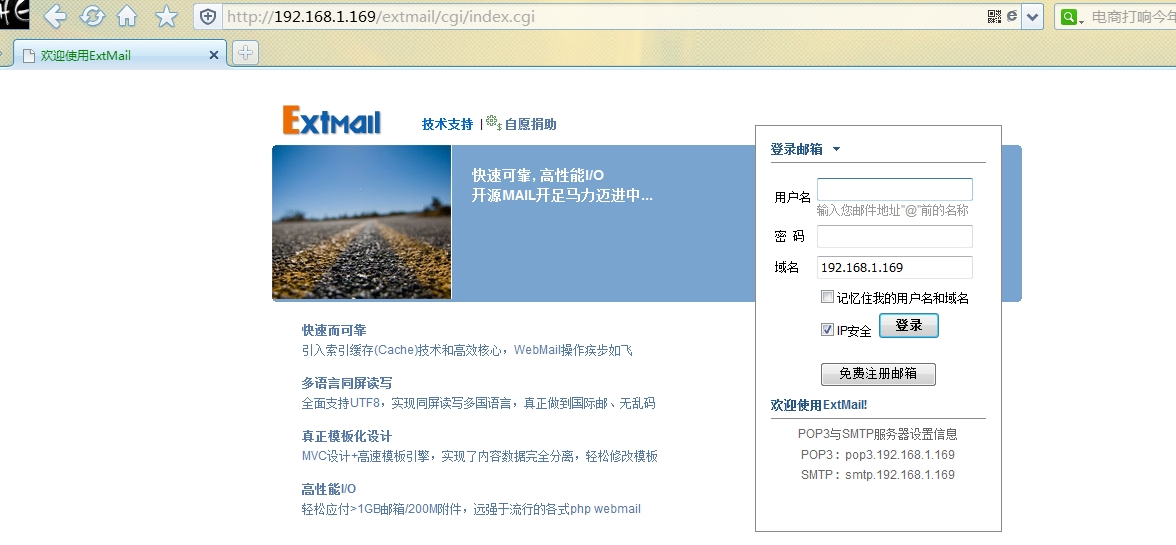
这样页面已经能正常显示了,
但是现在我们还没有能力注册账号,因为我们的extman还没有安装。
7、安装extman
[root@mail Unix-Syslog-0.100]# cd /var/www/extsuite/ //切换到安装目录
[root@mail extsuite]# cd extman
[root@mail extman]# cp webman.cf.default webman.cf //更改配置文件名字
[root@mail extman]# vim webman.cf //编辑配置文件
12 SYS_MAILDIR_BASE = /var/mailbox
21 SYS_CAPTCHA_ON = 0
39 SYS_LANG = zh_CN
注意:上述数字为配置文件内行号
[root@mail extman]# vim /etc/postfix/main.cf //修改postfix配置文件指明mailbox账户的目录
home_mailbox = Maildir/
[root@mail extman]# chown -R postfix.postfix /var/www/extsuite/extman/cgi/ //修改extman cgi文件的所属组和所有者
[root@mail extman]# vim /etc/httpd/conf/httpd.conf //在apache的主配置文件中Extmail的虚拟主机部分,添加如下两行:
ScriptAlias /extman/cgi /var/www/extsuite/extman/cgi
Alias /extman /var/www/extsuite/extman/html
创建其运行时所需的临时目录,并修改其相应的权限:
[root@mailextman]# mkdir -pv /tmp/extman
[root@mail extman]# chown postfix.postfix /tmp/extman
重启Apache服务在次进行测试:
正常显示了之后我们首先要建立虚拟域,选择管理即可登入extman进行后台管理了。默认管理帐号为:root@extmail.org 密码为:extmail*123*
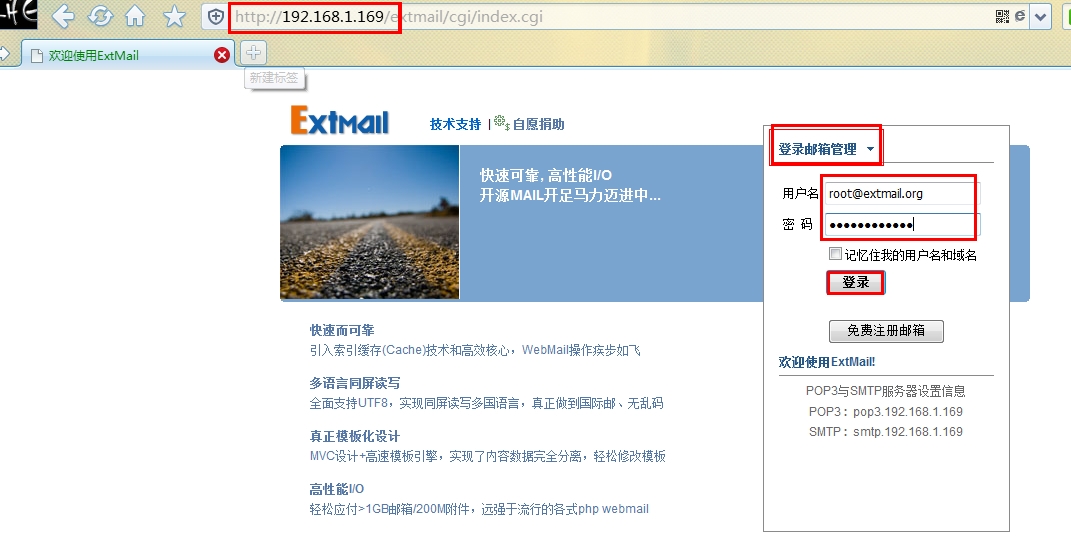
新建域:

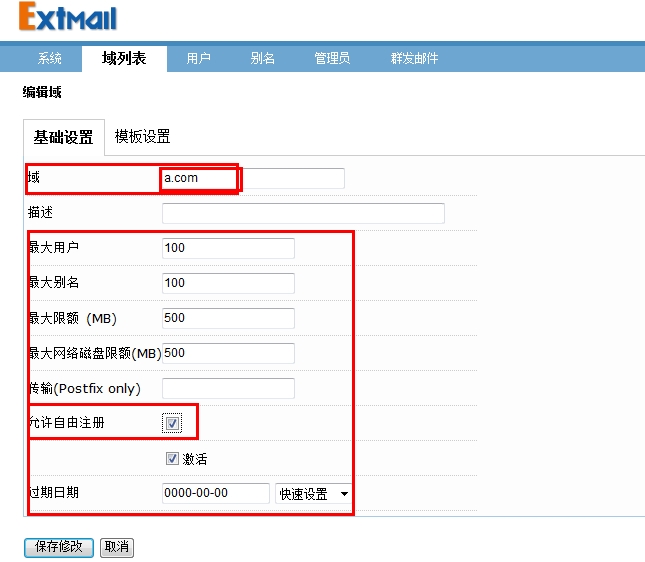
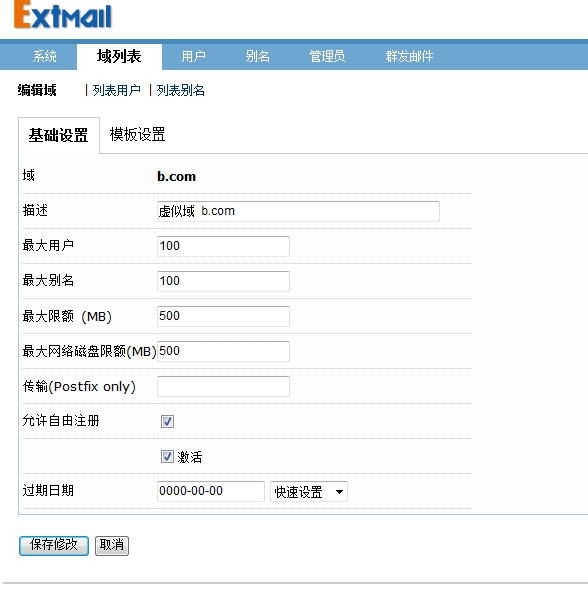
新建用户:

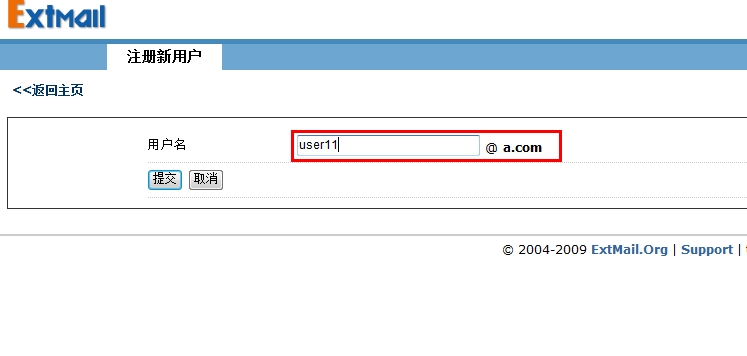
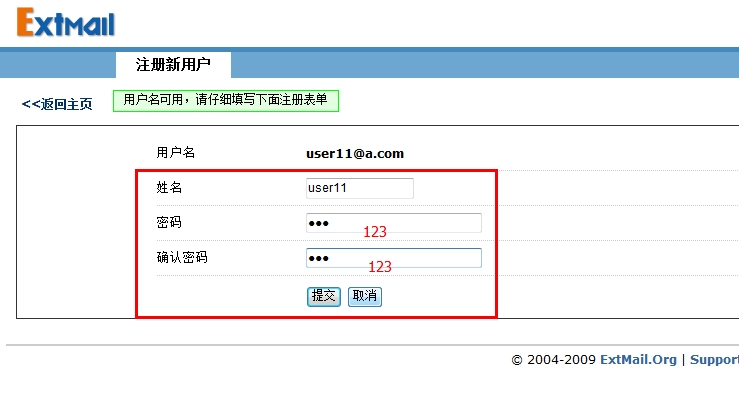
我们测试就新建2个用户:user11,user22
用user11向users22发送邮件:
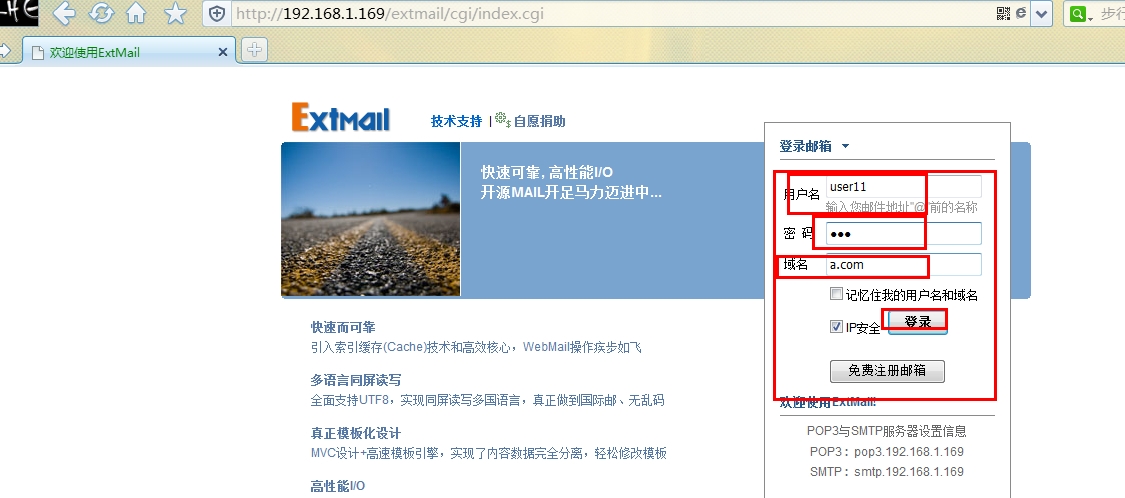

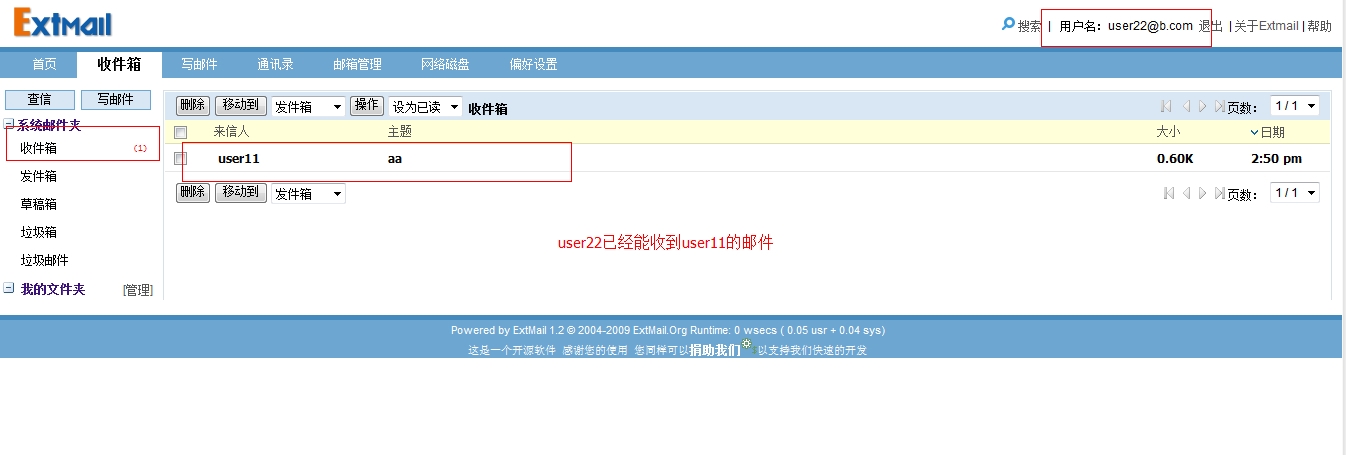

到这里我们的extmail电子邮件系统已经成功搭建起来了。
